
Recording Guide
한국어
English
Studio Recording Guide
Before your visit, find the studio location, Wi-Fi details, house rules, and checkout steps here. This guide is designed to help you quickly find what you need on session day.

Index
Contents
Jump to the information you need, from directions to checkout instructions.
Check the location and travel options before your visit.
- Address B1, 7, Dongil-ro 59-gil, Seongdong-gu, Seoul, South Korea
- From Gunja Station Exit 8 Follow the route map below. From Gunja Station Exit 8, walk along Dongil-ro toward the studio.

- Nearby bus stops Gunja Bridge South End (군자교남단) and Gunja Bridge Entrance (군자교입구)
- Parking Paid parking is available at Songjeong 19-19 Parking Lot. Spaces are limited, so public transit is recommended.
Please review these studio rules before your session.
Wi-Fi information
SSID
Studio
Password
00009761
Scan the QR code with your phone camera to connect to Wi-Fi.

Monitoring during recording
- If you must use speakers while recording, keep the volume low.
- In the control room, please monitor through earphones or headphones whenever possible. Sound from the speakers may be picked up by the microphone.
Please keep to your booked time
- Please arrive and leave on time so the next users can begin as scheduled.
- If you exceed your booked time, the host may request an additional payment.
- Setup, packing away equipment, and restoring the room are included in your booked time.
Facility use and etiquette
- Smoking, including e-cigarettes, is prohibited inside the studio and throughout the building.
- Alcohol and food are not allowed. Drinks and simple packed meals are permitted.
- You are responsible for the cost of equipment damage caused by liquids.
- When using filming equipment such as tripods, lights, or rails, take care not to damage the floors or walls.
- The recording booth partition is delicate; please take extra care around it.
- If rented equipment is found damaged after use, the cost of the damaged item will be charged.
- For damage to walls or floors, compensation will be based on the contractor’s estimate.
- You are also responsible for costs if improper use of equipment damages the building or equipment.
Guest count
- Please book according to the number of people who will visit that day.
- Please notify the host in advance if the number of guests increases.
- If the agreed guest limit is exceeded, the host may cancel the booking or request an additional payment.
CCTV operation notice
- CCTV is installed and operated to help keep the facility safe.
- The cameras are used for crime prevention, fire prevention, and facility safety.
- Recording takes place continuously, 24 hours a day.
- CCTV coverage is limited to the studio interior.
- The CCTV contact is the facility manager: 010-4626-9761.
Connect your MacBook to the studio equipment
Unplug only the Thunderbolt 4 and HDMI cables from the back of the Mac mini, connect them to your MacBook, and reconnect both to their original ports when you are finished.
01
Unplug the cables from the Mac mini
Disconnect the Thunderbolt 4 and HDMI cables from the back of the Mac mini.
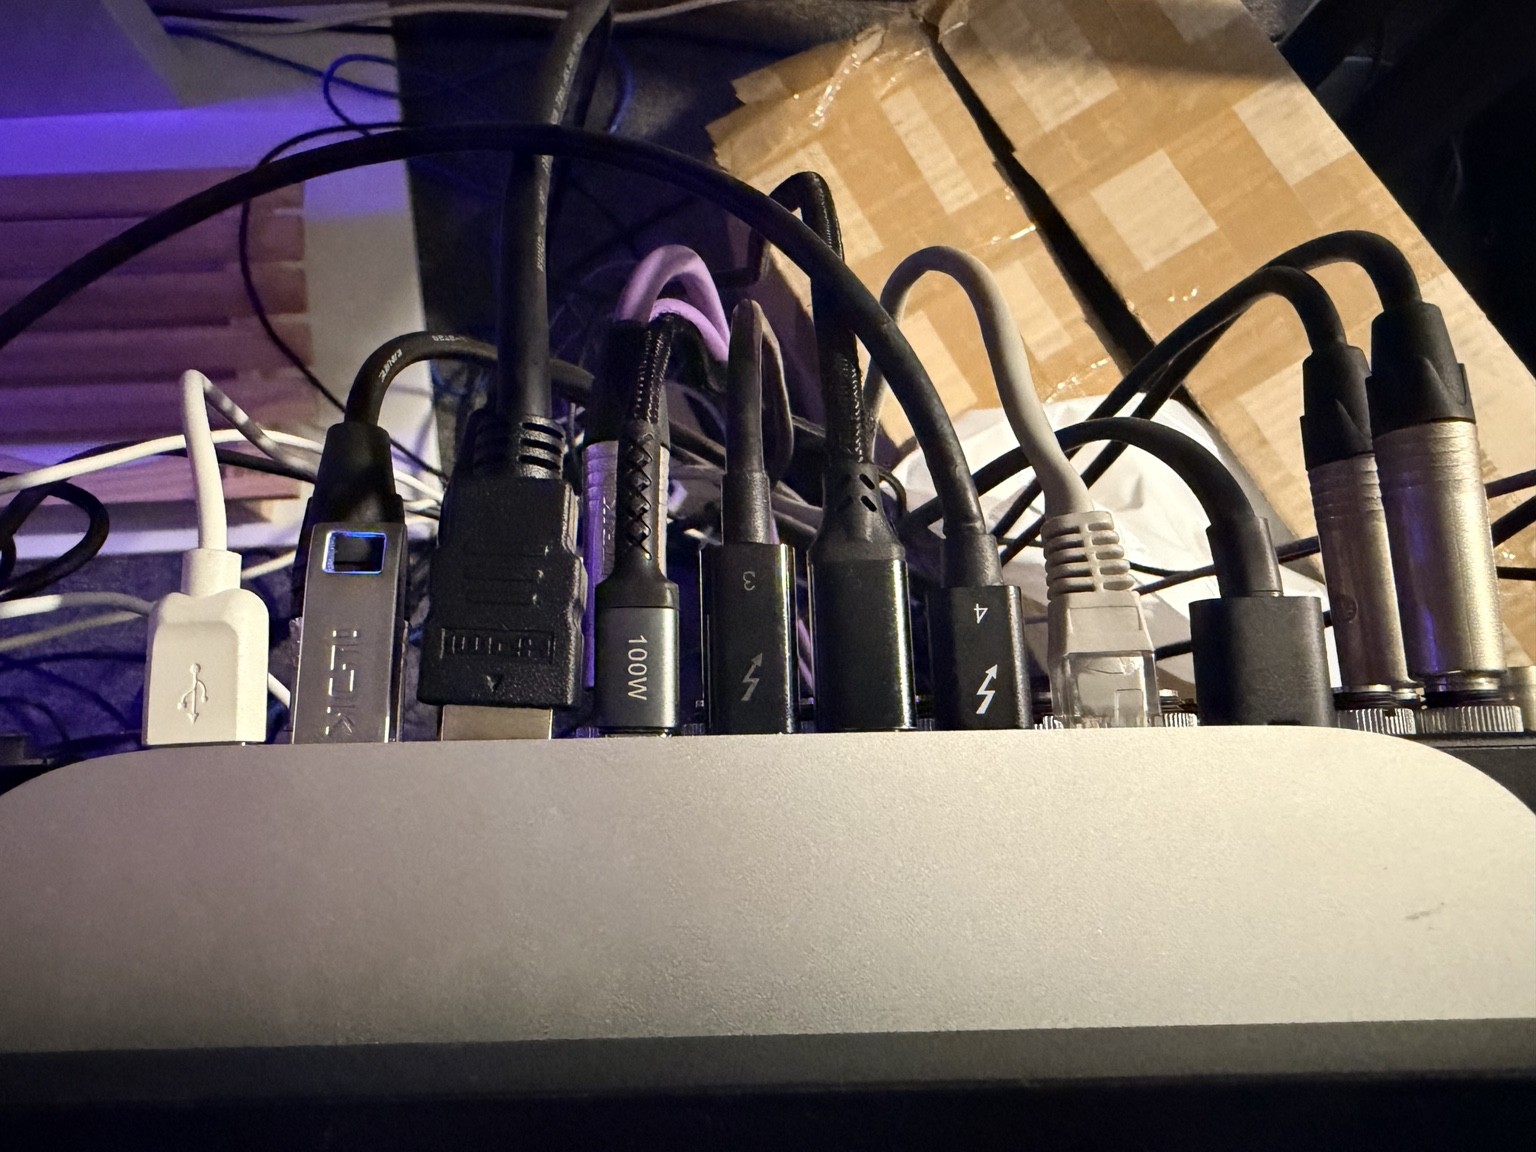 Mac mini rear · actual photo
- Thunderbolt 4 cable lime marker
- HDMI cable light-blue marker
02
Connect them to your MacBook
Plug the cables into your MacBook's Thunderbolt and HDMI ports.
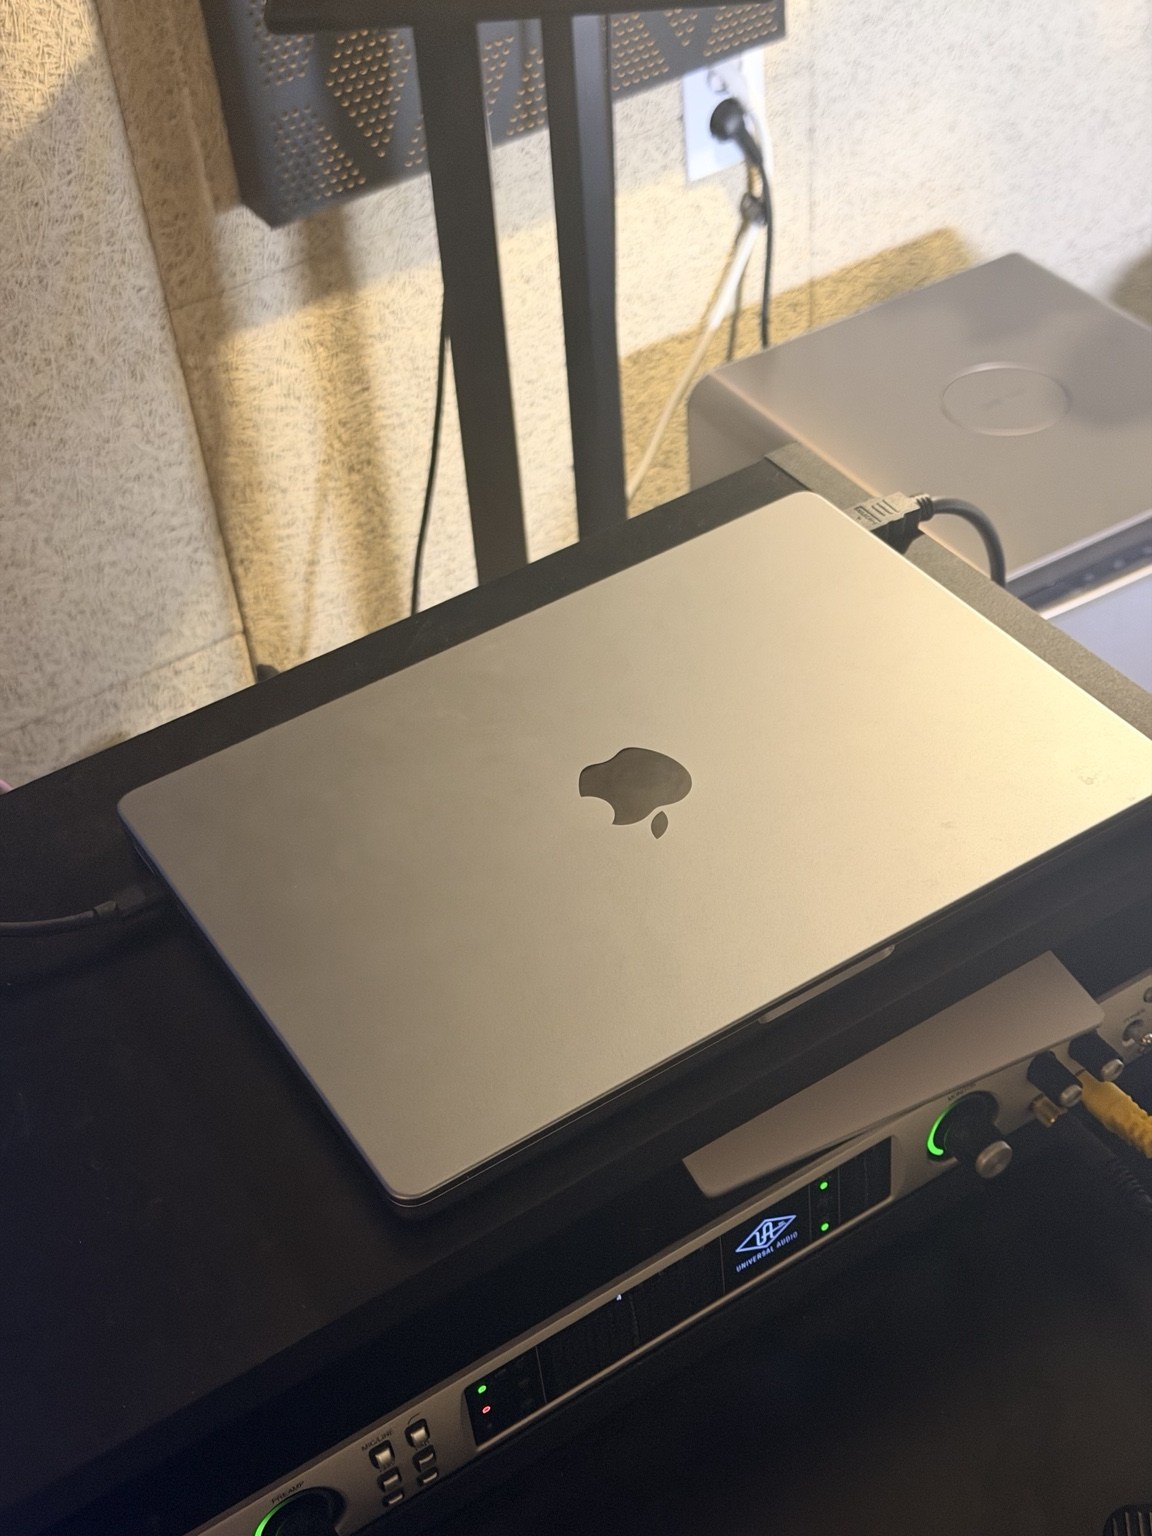 MacBook connection area · actual photo
- Thunderbolt 4 → MacBook Thunderbolt port
- HDMI → MacBook HDMI port
03
Restore the original connections
When finished, unplug the Thunderbolt 4 and HDMI cables from your MacBook and reconnect both to their original ports on the back of the Mac mini.
Personal MacBookStudio Mac mini
Reconnect both cables so the setup is ready for the next user.
Cable routing
THUNDERBOLT 4Apollo Quad Thunderbolt 2 + two main-room monitors
HDMIRecording-booth monitor
Before connecting
- Leave all other cables connected. The Thunderbolt cable connects the Apollo Quad Thunderbolt 2 and the two main-room monitors; HDMI is for the recording-booth monitor.
- Hold each cable by its connector and pull it straight out.
- If your MacBook asks to allow an accessory or device to connect, choose “Allow.”
- Your MacBook may also need the UAD audio driver, permission settings, or the correct audio device selected in your DAW.
Connection checklist
0 / 3Check all three items before use.
The studio is unattended. Please complete the following checks before you leave.
As the studio is unattended, please make sure to follow these steps when leaving.
Turn off lights and heating
- Turn off all lights, the air conditioner, and all heating devices (boiler and radiators).
Secure the doors
- Please close both the main entrance door and the back door.
Waste disposal
- Collect all waste generated during your session and place it outside the building before leaving.
- Place general waste and meal containers in a large designated pay-as-you-throw bag.
- Put food waste in a food-waste bag and place it in the food-waste bin on the first floor.
- Sort plastic, cans, and glass by type into separate plastic bags.
- Collect paper and cardboard in a box for disposal.
If you cannot find something, check the locations below.
- Recycling bags Beside the trash bin near the back door.
- Circuit breaker To the right of the entrance stairs.
- Radiator Behind the right side of the sofa.
- Air conditioner remote Beside the indoor light switch.
- Fire extinguisher Beside the waste area near the back door.